Saturday, February 20, 2010

Chocolate, chocolate, chocolate!

I won't lie, I am a kitchen snob. I don't believe in recipes that take less than 12 ingredients and don't require at least 2/3 of my counter space and half of my mixing bowls to prepare. But I have been searching for the perfect flourless chocolate cake forever, and tried all sorts of fancy variations, but none of them had the right texture. So, in a moment of desperation, I tried one of those tacky online video instructionals:

www.metacafe.com/watch/1119791/how_...

I had little faith in it, so I halved the recipe and use a 6" pan. It only has 5 ingredients, no mixer required, and I didn't even have to separate my eggs.

Oh. My. God. It is soooo good! I had been planning on topping it with sliced strawberries and drizzling on some sweet cream cheese topping, but I ended up eating it plain, it was so good!

If you try this recipe, please let me know! If you are on a diet, please ignore the fact that there is a whole cup of butter in this cake lol. And use real, unsalted butter. Margarine or shortening won't cut it. I used Ghirardelli bittersweet chocolate at a 60% cocoa rating (your cake is only as good as your chocolate, after all), and Hershey's Special Dark cocoa powder, so it was extra rich.

I was gonna post a picture. I promise. But the cake didn't even survive long enough to fully cool down. (Don't worry, I had help!) ;)

Monday, February 1, 2010

Ribbon Cube Tutorial

When a baby is handed a new plush toy, often the first thing they usually go for... is the tag. They crinkle it, chew on it; for some reason they are just fascinated by it. So I made a cube that is covered in tags. There is a company out there that already makes these and sells these, but they are out of my price range. I won't mention their name because they are very very sensitive about copyright and such. I am not making these to sell, nor to I wish any reader to. The original maker of these toys retains such rights. I just can't afford them!

Materials:

Small amounts of soft fabric (fleece, minky, or fuzzy fabric is good).
Ribbon scraps (satin, grosgrain,organza, or taffeta. Preferably a mixture of colors and textures)
Polyfill
Jingle bells (optional)

I save ribbons used on gift box decorations for this kind of stuff. Most of the ribbons here were leftover from my baby shower!

First, cut six squares from the fabric. I did two of each color so that no two colored touched on the cube. I made my squares 9"x9" because the squirt loves to glomp onto big plushies, but a more reasonable size is probably 7"x7".

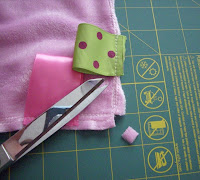
Cut the ribbons to approximately 24 - 4" strips. Fold the ribbons and press (careful- use a low iron setting, and watch out for melting!). Then pin, facing inward on the right side of the fabric, along the edges. For two squares(of the same color), cover 4 sides. For 2 squares, cover 2 opposite sides. Leave the remaining two without any ribbons. You can place the ribbons randomly, or in a pattern. Stitch over top of the ribbons, securing them.


Once all the ribbons are secure, take the two taggless squares and the two squares with only two tag sides, and sew them together at on the tag sides, right sides together. Alternate colors to make a strip:


Then sew the two ends together to make the body of the cube shape. Now take your two fully-tagged squares and clip little squares into the corners. This is so that the corners of the cube with turn correctly.


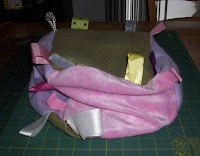
Now sew the top and bottom to the body of the cube, right sides (and tags) all in. Make sure to be careful pinning at the corners. Leave half of one edge open to turn and stuff the cube. Turn right-side out. You now have a nicely deflated cube!


Stuff with polyfil and jinglebells. I have found that placing the bells just inside the fabric sides, rather than in the middle of the stuffing, allows for better sounds. Stuff to desired firmness. I prefer kinda soft so that the squirt can squish the cube in her grip.


Sew closed and ta-da! Ribbon cube!

Sunday, January 31, 2010

Fabric scraps and Flowers!


Well since we have been snowed in all weekend, I was bored and could not drive to the store to buy stuff to craft with... so I had to work with what I had at hand :) Firstly, here are a few small projects I did with scraps of a pink paisley satin leftover from a project. I used a babyfood jar to make a button jar, then made a flower using the tutorial found here.


I used the flower as a corsage pin to dress up a top I found at a thrift shop:


Then I glued fabric to a thick piece of cardboard and decorated some clothespins to make a mini project board using this tutorial. Hers looks way better than mine, but hey, she was using a real wood board and jumbo clothespins. Mine was free.


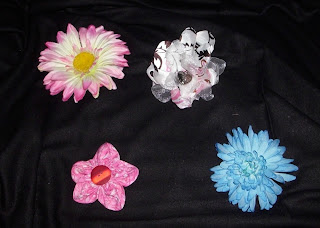
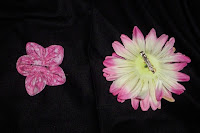
Next I made some flowers to put on the squirt's hats that I had crocheted last weekend. I did this by attaching pins to the back of silk flowers, and by making flowers from scraps of fabric.

For the pink button flower, see this tutorial.


I think the squirt likes her new hats!